Pages

Wednesday, October 27, 2010

How my Loft Space came to be.

I probably should have posted this before I put up what my loft space currently looks like...I guess I was just a touch too excited about my organizational triumph to bother so I'll post about it now.


Its kinda a funny story really, my space went from being our coffee table downstairs to the little loft space where it currently resides but getting everything neat and tidy wasn't a walk in the park. Sadly I didn't take as many pictures as I should have so I guess you'll have to use your imagination.

This is my table, typical 8ft table and that space is 8ft so why of why didn't 2+2=4??? 
I still have no idea but it took me 20 minutes to get this table this far but I was determined because this just needed to happen to make one sweet space and if it wouldn't I would get power tools to make it happen but luckily it didn't have to come to that. 


 To make it fit I unlatched it and bent it, got underneath it putting each hand and foot to a leg then slowly started to walk the legs and shimmy them into place. When it went as far as I could get it to go I did the most logical next step.....I SAT ON IT!!!!!
I'm not a big girl but I have gained a little extra weight due to my injury so I figured that would work to my advantage and it did.


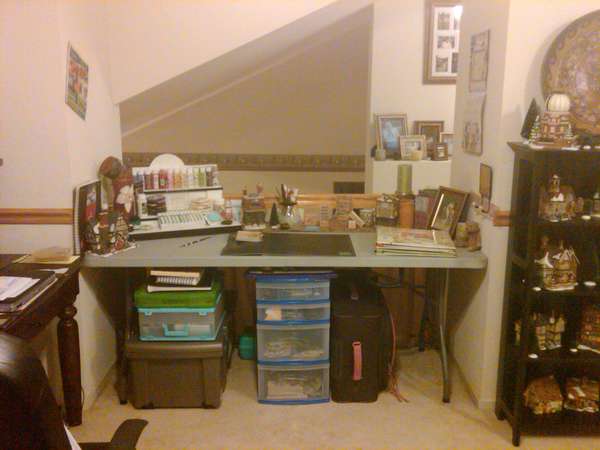
So here was the first version of my space...I sure did collect a bit of stuff in a short amount of time but I got it all on sale so I dont feel as bad for spending so much....my DH doesn't have the same thoughts though lol.


This is the first version of my display piece before I purchased all those awesome stamps...I miss having the luxury of space on there but at least its filled with lots of wonderful little tools.


Thats pretty much where my space started if you haven't seen the updates you can view them on this post. Oh and in case your wondering it took me a total of 3 hours total to make all this happen but since I'd have to stop and rest it was like a 5 hour project!


Thanks for visiting, I hope my little story gave you a laugh or at least a smile :D


A Cherry On Top!

I've been sitting on this pack of K&Co paper for a bit, not knowing what to do with it so I gave myself the challenge to pick out 1 sheet of paper and use that as my inspiration. I roughed up the edge on the pattered paper with my nail then inked the edges after.
I used a Tracing Wheel to imprint stitch holes onto the red card base before I ran over them with a silverish gel pen to make my faux stitching.
I finished this card up by stamping a second Cherry and popping it up on a foam dot.

Things I used for this card:


  • Inkadinkado - 4 piece Summer Assortment
  • K & Company - Amy Butler Tea Box 12x12 paper assortment
  • Distress Ink:: Frayed Burlap, Walnut Strain, Orange Marmalade
  • Staples - Silver Gel Pen
  • Therm O Web - Foam Adhesive squares (small)
  • Dritz® Tracing Wheel - 6'' Plastic Handle

Thanks for looking,

Monday, October 25, 2010

A Halloween Fiesta!

I wanted to make a Halloween card that was fun, festive and just a little touch of spooky. I like to call this little guy my Fiesta Owl, a cute creepy owl in cuddly colors...you just cant help but smile at that!


Products I used:
  • Recollections Cardstock paper - Kraft and Yellow
  • Hero Arts - AL: Happy Lower Case Alphabet
  • Imaginisce Snag 'em Stamps - Spooky Town Collection: Owl
  • Distress Ink: Spiced Marmalade, Crushed Olive and Walnut Stain
Thanks for taking a peek today,

Sunday, October 24, 2010

A Little Love for OWH


I made these cards for Operation Write Home, I saw a post saying they were in need of a little love so I'll be making a gang more of these to add to start off my next box with.


Products I used:

  • Hero Arts: Etched Medallion
  • Hero Arts: Leaf Prints
  • Memory Box: Breezy Branch
  • VersaMagic Dew Drop in Egg Plant, Spiced Pumpkin
  • ColorBox Cat's Eyes in Pigments: Silver & Purple Matalic set
  • Distress Inks: Antique Linen and Frayed Burlap
  • The "Love" comes from a set of clear stamps that I didnt save the label for, oops!
Thanks for looking!

Saturday, October 23, 2010

Lace & Medallions, Oh my!

These are 2 of my favorite styles of cards to make because their very easy to make and very beautiful. It also doesn't hurt that these are 2 of my favorite stamps too.


I used a simple pale green card base to start and then layered a French Script stamp over the whole card. 
Next I stamped the flower, followed by leaves, sprigs and the greeting.
 I finish off this card with a little Bling in the center of the flower.

What I used on this card:
  • Hero Arts: Etched Medallion
  • Hero Arts: Leaf Prints
  • Memory Box: Sprig
  • Distress Ink in : Antique Linen, Crushed Olive and Frayed Burlap.
  • VersaMagic Dew Drop in Pumpkin Spice


I'm a huge fan of Medallions and instantly fell in love with this one by Hero Arts.
I inked the edges of my card first before I applied the Medallion. For the Medallion I used Versamark Watermark and then applied Chalks with dabbers in Red, Pink and Glittery Brown.
I finished it off with my Sentiment and a touch of Bling in the center of the stamp.


What I used on this card:

  • Hero Arts: Leaf Prints (sentiment) 
  • Hero Arts: Starburst Lace
  • Inkadinkado: Blending Chalks
  • Distress Ink: Frayed Burlap
Thanks for looking!

Friday, October 22, 2010

Baby Boy Bunny


Isn't this little bunny adorable? It reminds me of a wall hanging with that little blue brad at the top. 


What I used for this card:

  • Stampin Up! - A New Little Someone set
  • ColorBox Cat's Eye - Pigment & Fluid Chalk sets used
  • Distress Ink - Antique Linen
  • Prismacolor Colored Pencils


Thanks for looking!


The Loft

I thought the best post to start my new blog out with would be to give you a tour of my crafting space. This is a space in my loft that I managed to squeeze a table into and after much organization (with more to come in the future) this is what my space has come to look like. 

This is a display piece that I picked up from Gottschalks before they closed, I scored it for $3!
With a little paint, stamped designs and clear lacquer its become the perfect setting for fun things.
I use Clear tacks to hang my Scissors or other tools I use often.
Inside of the Orchid tube (a Wine Bottle Gift Box) is where I keep my Paintbrushes and my Zester. Since I don't get into all too often I put those branches into it just to add a nice pop of color.


I love Department 56 houses and keep a couple on my table to remind me of the beauty of Christmas year round. The Purple & Blue box holds all of my clear stamps.


This is a close up of my Mini Clear Stamp holder. It was this odd little box I was given that had a Cigar logo on it. I used a few Cat Eye chalk inks to give it the aged look.


This wooden piece is one I just happened upon a few weeks ago in my Nana's (Grandma) basement. Its an old Seven Up crate still in perfect condition. This also helped to free up more space on my table and give a few of my drawers a little relief.


This gives you a little glimpse to the organization under my table. Also barely making it into the picture is my blue Heat Gun hanging on the wall. I use more clear push pins to to hang up the rest of my scissors and hole punch.


Here you can see the other side under my table.

Thanks for looking!
~Belinda